Add Row
Add Element
cropper
update
Triangle Health Insider
update
Add Element
  • Home
  • Categories
    • wellness
    • Nutrition and Dining:
    • Holistic Health:
    • Mental Health Resources
    • Fitness Trends
    • Healthcare News
    • Family Health
    • Lifestyle Tips
March 09.2025
3 Minutes Read

Discover How to Make Your Own Natural DIY Hairspray at Home

DIY natural hairspray setup on a marble counter with greenery.

Why Choose Natural Hair Care Products?

In today's world, the awareness around the toxicity of conventional beauty products is growing. Many traditional hair sprays are laden with harmful chemicals such as PFAS, VOCs, and other harmful solvents that can irritate not just your hair but also your overall health. As people become more conscious of what they put in and on their bodies, natural alternatives are gaining ground. This article will explore a simple, effective DIY hairspray recipe that not only holds your style but also supports healthier hair.

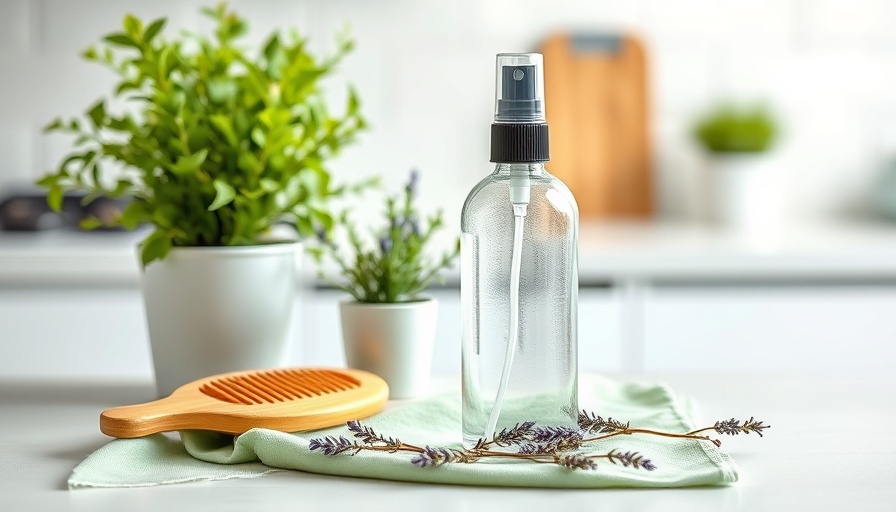
DIY Natural Hairspray: A Simple Recipe

This natural hairspray is made from just three main ingredients: distilled water, sugar, and alcohol, along with your choice of essential oils for fragrance and added benefits. What’s remarkable is that sugar is the secret ingredient giving it the hold you desire.

Essential Ingredients Breakdown

Distilled Water: Using distilled or filtered water ensures that your hairspray is not contaminated with bacteria or impurities.

Sugar: About 2 tablespoons of white sugar is used to provide hold. Despite its sweetness, in this form, it serves more as a polymer that helps set your hairstyle rather than something to consume.

Alcohol: A spirit of at least 80-proof, like vodka or spiced rum, is preferable for its lovely scent and effectiveness. This ingredient not only helps in drying the hairspray quickly but also serves as a natural preservative.

Essential Oils: Essential oils like lavender, rosemary, and cedarwood elevate the performance of your DIY hairspray. Lavender promotes hair growth while rosemary helps with thinning hair. Meanwhile, cedarwood has a lovely earthy aroma and beneficial properties for scalp health.

Steps to Make Your Own Hairspray

The process for making this hairspray is quick and straightforward:

  1. Boil 1.5 cups of distilled water and dissolve 2 tablespoons of sugar in it.
  2. Once the sugar is completely dissolved, let the mixture cool to room temperature.
  3. Add in 1 tablespoon of your chosen alcohol and about 10-15 drops of essential oils.
  4. Pour this concoction into a 16-oz glass spray bottle for future use.
  5. Shake well before each use and spray onto your finished hairstyle to hold it in place.

The Benefits of Using Essential Oils

Many individuals might wonder why essential oils are regularly mentioned in recipes for natural beauty products. Not only do they provide delightful fragrances, but essential oils can also enhance hair health significantly. For instance, lavender has been shown to increase follicle count, while rosemary stimulates blood circulation, promoting healthier hair growth. Introducing these elements into your daily routine can lead to healthier scalp conditions, better moisture retention, and an overall enhancement of hair vitality.

Comparing DIY Natural Hairspray with Conventional Options

Switching from store-bought hairspray to a homemade version can result in more than just a safer solution. Many conventional sprays are laden with alcohols and synthetic polymers that not only dry out your hair but also contribute to long-term damage. By crafting your own, you're choosing ingredients that work harmoniously with your hair and health.

Final Thoughts: Take a Step Toward Healthier Hair Care

This DIY hairspray is not just a replacement for conventional hair products; it reflects a shift towards a more mindful approach to beauty and health. By using a blend of food-grade ingredients, you can ditch toxins while enjoying a customizable scent and hold. Take this step toward healthier living and share this recipe with friends and family. You might find that they are eager to join you on this journey to healthier beauty practices!

If you're ready to revolutionize how you style your hair, gather your ingredients and give this natural hairspray a try. Your hair and health will undoubtedly appreciate it!

Family Health

4 Views

0 Comments

Write A Comment

*
*
Related Posts All Posts
03.04.2026

Transform Your Cooking with Homemade Jalapeño Salt: A Spicy Seasoning Recipe

Update Spice Up Your Meals with Homemade Jalapeño Salt Adding a kick of flavor to your everyday meals just got easier with homemade jalapeño salt. This simple, mineral-rich seasoning is not only incredibly tasty but also allows you to control the spice level to suit your family’s preferences. Whether you enjoy it on grilled chicken, roasted vegetables, or even fresh fruit like mango and watermelon, jalapeño salt might just become your new pantry staple! Why You Should Make Your Own Jalapeño Salt Homemade jalapeño salt is more than just a seasoning; it’s a way to enhance the nutritional value of your meals while being mindful of what you consume. Unlike store-bought seasonings, you know exactly what’s in your mix, ensuring a healthier choice for your family. Additionally, it’s a fantastic way to minimize waste if you have an abundance of jalapeño peppers during the harvest season or from your garden. The Making Process: Easier Than You Think! The method to create jalapeño salt is refreshingly straightforward. Simply slice your fresh jalapeño peppers, dry them out completely until they become brittle, then blend them with coarse salt until you reach your preferred consistency. For those who might be sensitive to spice, removing the seeds and membranes before drying can create a milder blend. However, if you love the heat, leaving them in will surely do the trick! Remember to wear gloves to protect your hands from the potent oils that can linger long after you’ve finished cutting. Flavoring Ideas: Customizing Your Jalapeño Salt Once you’ve mastered the basic jalapeño salt recipe, the flavor possibilities are endless! Try incorporating different ingredients to create varieties that your family will love: Smoked Jalapeño Salt: Roast your jalapeños before dehydrating for a deeper flavor. Garlic Jalapeño Salt: Add garlic powder to the blend for a savory twist. Citrus Jalapeño Salt: Mix in dried lemon or lime zest for a refreshing brightness. Using Jalapeño Salt in Your Cooking Not only is jalapeño salt versatile for various meat dishes and vegetables, it can also be a great finishing touch for snacks like popcorn or fries. Want to impress at your next dinner party? Use it to rim margarita glasses or sprinkle over a fresh avocado for an unexpected kick! Keep It Fresh: Storage Tips To keep your homemade jalapeño salt at its best, store it in an airtight container in a cool, dark place. Thanks to salt's natural preserving qualities, it can last for over a year when stored properly. Make sure to check for any excess moisture, especially if you’re using Celtic sea salt, as this variety tends to hold more moisture. Join the Flavor Adventure Creating your own jalapeño salt not only elevates simple dishes but also gives you an opportunity to explore flavors that resonate with your taste buds. As we embrace more home-cooked meals, why not make them exciting with a dash of homemade spice? Get your family involved, and make it a fun experience together! As you dive into this flavorful venture, consider sharing your creations with friends and family. A jar of homemade jalapeño salt makes a thoughtful gift for anyone who loves to cook, inviting them to join you on this tasty journey! Ready to try your hand at making this zesty seasoning? Gather your ingredients and get started today!

02.28.2026

Exploring Enzymes: Essential Insights for Better Digestive Health

Update Unlocking the Power of Enzymes for Better Health In the hustle and bustle of daily life, it’s easy to overlook the intricate workings of our bodies. Among the unsung heroes working tirelessly behind the scenes are enzymes, essential proteins that play critical roles in digestion, energy production, and overall bodily functions. Understanding enzymes can empower individuals to make informed health decisions, particularly parents and adults seeking optimal wellness for themselves and their families. The Essential Functions of Enzymes Enzymes are nature's catalysts, crucial for facilitating biochemical reactions without being consumed themselves. With specialized functions, these molecules—like lipase, amylase, and protease—target specific types of nutrients. For instance, lipase assists in breaking down fats, amylase focuses on carbohydrates, and proteases tackle proteins. The efficiency of these enzymes is vital for proper nutrient absorption, ensuring our bodies extract the maximum benefit from the food we consume. Why We Might Need Additional Enzymes Several factors can disrupt our body’s natural enzyme production. Poor soil quality affects the nutrient density of fruits and vegetables, while modern diets and stress can impact gut microbiota negatively. Many people are unaware that they may not be adequately absorbing nutrients due to insufficient enzyme levels, which can lead to symptoms like bloating, gas, and discomfort after meals. Digestive enzyme deficiencies, often linked to conditions like celiac disease, can exacerbate gastrointestinal issues, highlighting the importance of these proteins in maintaining gut health. Choosing the Right Enzyme Supplements If your body struggles to produce the necessary enzymes, supplementing with quality enzyme products can fill the gap. These supplements can be beneficial, especially for those experiencing digestive issues. They can be taken with meals to enhance digestion, alleviating discomfort from gas and bloating. For example, Lactaid and Beano are designed for specific challenges; Lactaid contains lactase to help those who are lactose intolerant, while Beano helps in breaking down difficult fibers found in beans and certain vegetables. Understanding Different Types of Enzymes As you explore enzyme supplements, it’s crucial to understand the various types available. They range from digestive enzymes, which support the breakdown of food, to systemic enzymes that assist with inflammation and circulation. For individuals with conditions like chronic pancreatitis, prescription enzyme pills might be necessary to compensate for low natural production. It's always best to consult with a healthcare professional to determine what is right for your needs. Practical Insights for Families Being aware of your family's dietary habits and potential digestive issues is the first step towards better health. Incorporating natural sources of enzymes, like fruits (papaia and pineapple contain bromelain, a digestive enzyme), can be beneficial. Encourage your family to chew their food thoroughly and eat mindfully to support natural digestion. Potential Risks and Considerations While enzyme supplements can offer relief, they are not without risks. Overuse or taking the wrong type can lead to adverse effects. Thoroughly researching products and discussing them with a healthcare professional can help mitigate potential issues, especially for those with existing health conditions. Finally, by enhancing our understanding of enzymes and their role in health, we can take more proactive steps towards well-being. Whether it’s through dietary choices or targeted supplementation, leveraging enzymes can lead to improved digestion and overall health. If you're curious about incorporating enzymes into your life, consider exploring your options to see if they might provide the support your body needs. Understanding how these digestive aids function may lead to better health for you and your loved ones!

02.26.2026

Unlock the Secrets to Making Ultra Creamy Lip Butter at Home

Update Embrace Natural Beauty: The Allure of Lip ButterIn a world where lip care products range from traditional lip balms to luxurious lip butters, the latter is quickly capturing the hearts of beauty enthusiasts. Ultra creamy lip butter stands out not only for its rich texture but also for its ability to deeply nourish and hydrate the lips. The appeal of lip butter lies in its simplified, yet effective recipe—comprising a blend of natural ingredients that ensure your lips stay soft and luscious. Understanding Lip Butter vs. Lip BalmWhen discussing lip care, it’s essential to clarify the difference between lip butter and lip balm. While both serve a similar purpose of moisturizing the lips, they do so with varied formulations. Lip balms are typically made with a combination of waxes and oils designed to coat the lips. In contrast, lip butters contain additional creamy ingredients such as shea butter, cocoa butter, or mango butter, which contribute to a denser and more emollient texture. Key Ingredients That Make a DifferenceThe secret to a successful homemade lip butter lies in its ingredients. Key components include: Mango Butter: Known for its delightful softness, mango butter offers a smooth consistency without feeling overly greasy on the lips. It aids in maintaining hydration while providing a subtly pleasant scent. Cocoa Butter: This ingredient not only adds thickness but also creates a protective barrier against moisture loss. Its delightful chocolate aroma makes it a favorite in many recipes. Meadowfoam Seed Oil: This lesser-known oil is rich in fatty acids, enhancing the spreadability of the lip butter while locking in moisture effectively. Crafting Your Own Lip Butter at HomeMaking your own lip butter is a straightforward process that allows for personal customization. Combining beeswax, a buttery component (like cocoa or mango butter), a moisturizing oil (meadowfoam or a preferred carrier oil), and essential oils results in a product that is tailored to your preferences and needs. Here’s a simple recipe: 1 TBSP cocoa butter 1 TBSP beeswax pellets 1 TBSP mango butter (or shea butter) 1 TBSP meadowfoam oil (or other liquid carrier oil) 8-10 drops essential oil (lip-safe) To prepare, gently melt all solid ingredients using a double boiler method, then add your essential oils before pouring the mixture into containers. Allow to cool completely before use for best results. Why Essential Oils Enhance Your Lip ButterEssential oils add a sensory element to your lip butter—infusing it with delightful aromas while often providing additional benefits. Options like peppermint add a refreshing coolness, while lavender brings calming effects. It's vital to select lip-safe essential oils and use them sparingly for added pleasure without irritation. The Nourishing Benefits for FamiliesFor parents seeking effective solutions for dry, chapped lips in their families, crafting your own lip butter can be a rewarding project. Unlike conventional lip products that may contain synthetic ingredients, a homemade lip butter allows for complete control over what goes onto your skin—ensuring it’s safe for both adults and children alike. A Personal Touch: Share and GiftWhat better way to enjoy your homemade creations than to share them? Lip butters make for thoughtful gifts that demonstrate care and consideration for others. Create personalized labels, and perhaps include a small note about the benefits and ingredients of your lip butter. Sharing these with friends and family promotes not only your efforts in DIY craft but enhances personal connections. Conclusion: A Step Towards Holistic HealthMaking your own ultra creamy lip butter is more than just a beauty endeavor—it's a journey towards embracing holistic health principles in your daily life. Understanding the natural ingredients you apply to your body contributes significantly to your overall well-being. So gather your materials, unleash your creativity, and recommend your homemade lip butter to your loved ones!

Terms of Service

Privacy Policy

Core Modal Title

Sorry, no results found

You Might Find These Articles Interesting

T
Please Check Your Email
We Will Be Following Up Shortly
*
*
*